Strip quilting is an easy method of quilting that gives stunning results!


With strip quilting you sew strips of fabric unto a square paper or fabric base. The paper or fabric helps stabilize the strips from stretching. Your strips can be any width. You start by pinning down your center strip and laying your second strip on top of it right sides together lining up one of the edges. Sew 1/4″ from the lined up edge. Iron the second strip to the side (don’t use steam). Sew a strip to the other side of your center strip in the same way. Lay a strip of fabric on top of your second strip, right sides together, lining up the raw edges. Sew 1/4″ from the edge. Repeat on the opposite side of the block (strip 3). When your whole piece of paper is covered, trim off fabric that hangs off the edge of the paper. I recommend using a rotary cutter and a square for this making sure that all of your squares end up the same size.
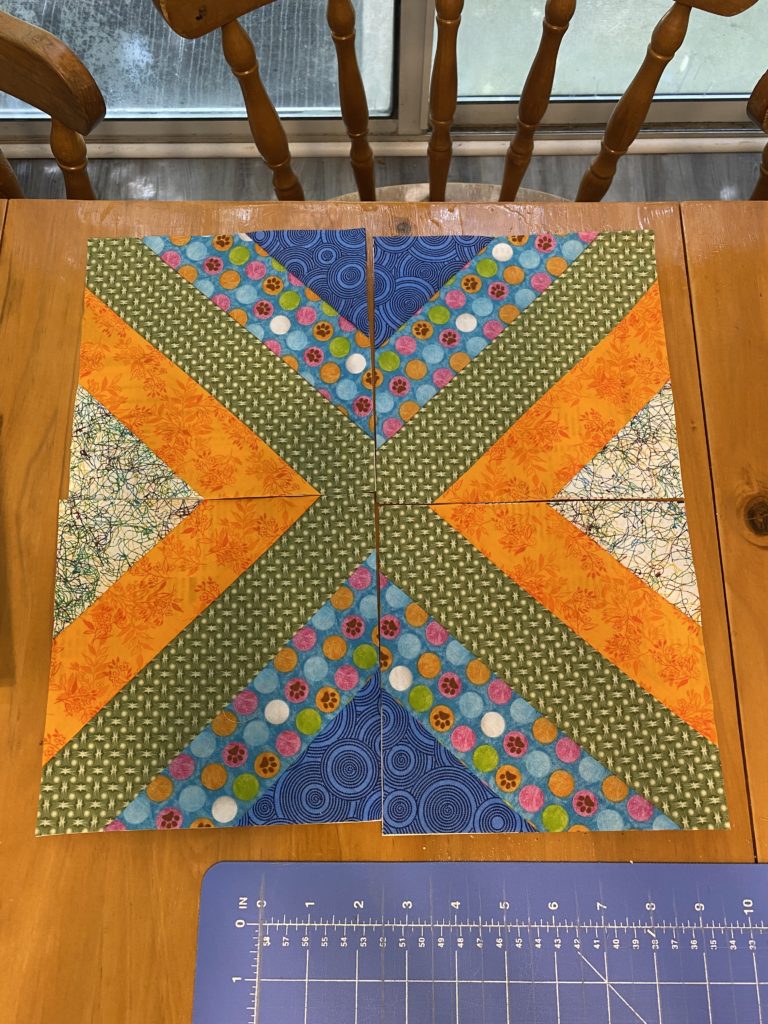
Once you have 4 blocks sewn and trimmed, you can play around with how you want to lay them out. These 4 blocks are each formed from the same four smaller blocks. They are just arranged differently.


